Guides on how to use/customize KiwiCursor
Table of Contents
Create a new cursor
To start, make sure debug cursor is on or enable it by running /kiwidebug, this is important to aligning the position of the image.
Kiwi.Settings.DebugCursor = true -- Shows a small dot at the cursor point
Now set or create a color in Kiwi.Colors, changing CursorTop or CursorBottom will edit the colors of the default cursor.
Kiwi.Colors = {
	CursorTop = Color3.fromRGB(0, 0, 0),          -- Color used by TopLayer
	CursorBottom = Color3.fromRGB(255, 255, 255), -- Color used by BottomLayer
  YourColorHere = Color3.fromRGB(255, 0, 0) -- Your color
}
Create a new cursor in Kiwi.Cursors or edit the existing ones, make sure to follow the template below.
YourCursorHere = {
		Enabled = boolean,  -- If the cursor is shown
		Priority = number,    -- Higher priority cursors override lower priority cursors
		Layers = {}       -- Highest rendered in order
	},
After your done creating a new cursor, create the layers of the cursor in the YourCursorHere.Layers table, the first index is the highest rendered while the last index is the least. Use the following format to customize the layer.
			[1] = {
				Image = "rbxassetid://IdHere", -- Image displayed
				Color = "CursorTop", -- Color3 value
				Size = {1, 1}, -- Size in scale
				Position = {0, 0}, -- Position in scale
				Rotation = 0, -- Rotation in degrees
			},
Create as many layers as you want, however the more layers the less performance (you should only be worried if you have 50+ layers). Now playtest and make sure your cursor is enabled and has a priority higher than any other enabled cursor, same priority cursors do not work well so make sure its unique.
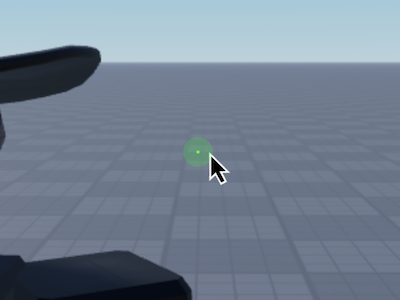
The cursor above is not alligned with the mouse position, to fix this change the size, rotation, or position of the layers in your cursor, the value for the default cursor is {-0.35, -0.1}, after that you should be finished with your cursor. Make sure the cursors tip is at the center of the green dot!
Create a drag object
To create a drag object, use Kiwi.ConnectObject() to connect the GuiObject or create a UIDragDetector (Gui) or DragDetector (Part), if you are not using a drag detector, set draggable to true and it will send drag signals
local Connect = Kiwi.ConnectObject(GuiObject)
Connect.Draggable = true
To use the drag signals, connect to them. The drag offset is the distance (offset) from the position of the frame, the position already has the drag offset applied, so use Position + DragOffset to reset it to the gui object’s position.
Connect.DragMoved:Connect(function(Position, DragOffset)
  GuiObject.Position = Position -- Position at where the mouse started the grab
  GuiObject.Position = Position + DragOffset -- Mouse locked at object's position
end)
Heres an example script:
local Connect = kiwi.ConnectObject(holder) -- Connect the object
Connect.Draggable = true -- Set draggable

-- Tweens
local DragStart = ts:Create(script.Parent, Cat_TweenInfo, {Size = UDim2.fromScale(1, 0.7)})
local DragEnd = ts:Create(script.Parent, Cat_TweenInfo, {Size = UDim2.fromScale(1, 1)})

-- Drag
Connect.DragStarted:Connect(function(DragOffset: number)
  DragStart:Play() -- Plays starting tween
end)

Connect.DragEnded:Connect(function()
  DragEnd:Play() -- Plays ending tween
end)

Connect.DragMoved:Connect(function(Position: UDim2, DragOffset: number)
	local minsize = Vector2.new(0, 0)  -- Locked to gui size
	local maxsize = holder.Parent.AbsoluteSize - holder.AbsoluteSize
	local x = math.clamp(Position.X.Offset, minsize.X, maxsize.X)
	local y = math.clamp(Position.Y.Offset, minsize.Y, maxsize.Y)
	holder.Position = UDim2.fromOffset(x, y)
end)
If your using a UIDragDetector (Gui) or DragDetector (Part) then you can use the naive functions.
Create linked cursors
To create a linked cursor, go to the Part or GuiObject you want to add the linked cursor to, you can only add linked cursors to these. Its also important that your cursor’s priority is high enough to be shown, as it still won’t be shown if another cursor is enabled. I recommend not using the default cursors for this as they are overrided by the module, you can create custom cursors by following the tutorial above.
Go to the properties tab of the object and scroll down until you reach attributes, add a string attribute called Kiwi_LinkCursor, if you changed Kiwi.Settings.LinkCursorName change it to that name, then put the name of the cursor in the attribute and you’re done!